Showing posts with label Food. Show all posts

Sunday, November 03, 2013

Pumpkin Scones for My Camden


It has been cold and rainy this weekend, Steve is at drill, and the boys and I are hunkered down here at home, as Camden has been running a fever for three days now, poor boy. Times like these make me want to be in the kitchen, making food for my boys. Camden hasn't had much of an appetite, but I thought I would make some pumpkin scones for him in hopes of getting him to eat something. Pumpkin scones are his favorite, and we use to be able to get them year-round at Starbucks, until sometime last year, when the powers that be decided they would be a seasonal item. That, along with the fact that they aren't cheap, prompted me to attempt to whip some up that he would like just as much. I have made scones many times before, and it always bugs me how they spread all over the place and sometimes come out in weird shapes. I have always wanted a Nordicware scone pan, but they are too pricey for me. Imagine my luck the other day when I found one at my local thrift store. The price? $2.65 - - much more to my liking than the $39.99 retail price. Score! I give the pan 5 stars...the scones came out perfectly, and they came out of the pan easily. The recipe I used came from Taste of Home, and can be found here.

Sunday, June 02, 2013

Smoothie Experimentation


This weekend has been a bit of a bust. Steve returned from Cambodia Friday evening - - we were so happy to see him! Unfortunately, he had to get up at 4:00 the next morning, and leave for drill weekend (about 3.5 hours from home). Also, I woke up in the middle of the night, running a fever and experiencing chills and body aches...ugh! It seems that the horrid cold/virus that has been going around finally caught up with me. Of course it happens on a drill weekend! Luckily, my boys are awesome, and they have been very good for me. Camden tends to worry when I am sick, so I have to try to act completely normal, even if I just want to suck my thumb and whimper. I can tell you that it was a challenge, yesterday! So here we are on day two, and with any luck, Steve will be home in about 8 hours. Hooray!
 
I have not felt like eating much the last couple of days, so smoothies seemed like the perfect solution. I had been dabbling in them a bit, before getting sick, after reading this post on my friend Jen's blog, and also just from a nutritional standpoint. I have had some significant digestive issues for the past few years, which were complicated a little more when I had my gallbladder removed a couple of years ago. Anyway, fruits and veggies are particularly difficult, so I rarely eat them. I was recently reflecting on my diet and kind of realized that it lacks nutritional value for the most part, and I need to figure that out. I did a bunch of reading and found that blended fruits and veggies might be a way to get what I need, so I have been trying out some smoothies.

 
I was inspired by Jen's green smoothie, but was a little afraid of the spinach. Not because of the flavor, but because roughage and I do not get along. At all. Anyway, the green smoothie I made contained frozen pineapple, frozen mango, frozen banana, a bit of vanilla soy milk, a dab of vanilla extract, a drizzle of agave nectar, and frozen spinach. I Googled frozen vs. fresh spinach and found that frozen is just fine to use. Plus, it costs less and I don't have to worry about it going bad. This smoothie was absolutely delicious.

 
This is my smoothie from this morning - - frozen organic strawberries, frozen banana, vanilla soy milk, and a couple of heaping spoonfuls of vanilla Greek yogurt. This is definitely my favorite right now.
 
I have also tried a peanut butter, banana, and soy milk smoothie. If you like peanut butter and banana, you will like it. The flavor is very mild. I think next time I will substitute some of the soy milk with Greek yogurt for a thicker result.
 
Does anyone else drink smoothies? What are your favorite combinations?

Sunday, January 20, 2013

Rosette Cake

It recently dawned on me that it has been approximately 21 years since I took Wilton cake decorating classes. I use to sell a lot of cakes back then, but haven't done any, except for family, in recent years. Times and styles have changed quite a bit, so I figured that now was as good a time as any to try and teach myself some new methods. One of my favorite types of cakes that I have been seeing a lot of are rosette cakes. I love to look at all the different kinds on Pinterest. I am particularly fond of this Neapolitan version, from I am Baker:
 
 
In the recent issue of Phyllis Hoffman Celebrate magazine, there was a recipe and a tutorial for a rosette cake, so I decided to give it a try.  
 
 
 For the cake, I used a Pillsbury triple fudge cake mix. I have absolutely no problem with cake mixes. Personally, I think they taste better than scratch cakes. In my experience, I have had a very difficult time finding a scratch recipe that produces a moist cake, while mixes are always moist. In between each layer is Smucker's hot fudge sauce. Once it is assembled, it goes in the freezer for an hour.
 
 
Next comes a thin layer of butter cream. I tinted mine blue, because the boys told me to.
 
 
The rest is easy-peasy. All you need is a pastry bag (I love Wilton disposable bags) and a large star tip. Then, you just cover the whole cake in spirals. I had to fill in a few holes here and there, but mostly it came out fine. I love the end result! I definitely need to practice a few more times before I would consider selling one. I love how many variations there are on this type of cake.  
 
 
I was hoping to get a good picture of the inside of the cake, but my lighting was a bit off, and it appears I smashed the cake on the left side. With this particular recipe, I loved the hot fudge between the layers. So good!

Thursday, June 28, 2012

Easy Iced Coffee


I have a bit of an iced coffee problem these days (see exhibit A, above). Luckily for my wallet, I prefer McDonald's iced coffee - - it is much cheaper (and tastes better) than Starbucks, in my humble opinion. Still, every time I buy one, I feel kind of guilty. I have made iced coffee with my Keurig in the past, but the K-cups specifically for iced coffee are too expensive, and hot coffee + ice cubes = very watery iced coffee.

Yesterday, I rememberd that Pioneer Woman did a post last year about making your own iced coffee, so I decided to look through her archives. Off to the store I went for supplies, and got down to business.


Pioneer Woman's recipe uses two gallons of water and a pound of coffee, but I didn't have a container big enough to mix that much in, so I halved the recipe and made just one gallon of concentrate. I recycled one of our gallon water jugs which worked out perfectly. I poured half the bag of ground coffee into the jug, and then filled the rest of the jug with spring waterThen, I let it sit at room temperature for about 8 hours.


When it was done steeping, I strained the coffee concentrate from the grounds, per Pioneer Woman's instructions. Then, it went into the fridge to chill overnight.


I decided to try Vietnamese iced coffee (using sweetened condensed milk as a sweetener). First, I filled my reusable cup with ice. then I filled it half-way with coffee concentrate. Next, I added 2 tablespoons of sweetened condensed milk, and a good splash of half and half. I went to stir it and of course, all of the ice cubes had fused together! So, I grabbed a cocktail shaker, poured everything in it, and gave it a good shaking. Everything got mixed, and it was actually nice and frothy when I poured it back into my cup. I think I will use this method from here on out!

The verdict? It is really, really good iced coffee. I wasn't sure that I would like it, but I actually love it. I'm so excited! Total cost? $8.67 for the coffee and the sweetened condensed milk (I always have half and half on hand so I didn't count that). I used approximately 1 cup of concentrate, and there are 16 cups in a gallon, so I should get about 16 iced coffees per batch. That works out to about 54 cents per coffee, as opposed to $2.11 at McDonalds. Yay!

As far as using sweetened condensed milk instead of sugar to sweeten the coffee? I really liked that, too. I had never heard of doing that before but I am glad I gave it a try. 

Monday, June 04, 2012

Sweet Pea and Parmesan Crostini

It has been pretty warm around these parts lately, and when the weather is like this, I don't feel like eating anything hot at dinner time. Things that appeal to me are pasta or potato salad, fresh basil, mozzarella, and tomato on crostini, or a plain old bowl of cereal. I saw this recipe not too long ago here, and then I saw a similar recipe featured on the Food Network. Since I had the ingredients on hand, I thought I would give it a try. I made mine a little differently in that I pulsed all of the ingredients in a food processor - - enough to chop it all up nicely, but not enough to make it mushy. I also just toasted my baguette slices in the toaster oven.

The verdict? This recipe is a keeper. It was just what I was hoping it would be - - light, fresh, and satisfying. I'm anxious to try the leftover spread tomorrow night, when the flavors have had a day to meld. The next time I make it, I may add a bit more basil, and might even throw in a little garlic. Yum!

Thursday, March 15, 2012

Crabby Patty Cupcakes

I wish I had gotten a better picture of these but alas, I did not. If you do not like Spongebob Squarepants, then you probably will want to skip this post. If you know anything at all about Spongebob, then you know what a Crabby Patty is. I'm afraid my children love Spongebob, and I have to admit that I have a bit of a thing for him myself. I can't help it. I don't know what it is...maybe I was just worn down over time, by repeated episodes (again and again and again) over the past few years. I'm aware that people have pretty strong opinions about ol' Spongebob, but it is my opinion that there are things far worse (in the form of cartoons) that they could be watching on television. Anyway, I am coming clean - - I love Spongebob and Patrick, and I really, really, really love Gary. I mean, how can you not love a snail that meows?
Anyway... I recently saw this recipe in a magazine and knew that I had to make them. Very simple...yellow cupcakes, which you cut in half after they have cooled. Then, you bake a pan of brownies (13x9 pan) and cool completely. Then cut circles using a 2 1/2 inch circle cutter. The cupcakes comprise the hamburger bun, the brownie is the hamburger patty. Then, take a container of vanilla frosting, divide it among three small bowls. Tint one portion green, one red, and one yellow. Put each portion into a Ziploc bag, and cut a very small opening at one corner. Put a brownie patty on top of one of the cupcake bottoms, then squiggle green around the edges, followed by red, then yellow. Top with cupcake. If you like, you can lightly brush the top of each cupcake with some Karo syrup, and then sprinkle with sesame seeds.
I had fun making these, and the the boys just loved them. Even my big boy.

Tuesday, November 08, 2011

Kitchen Therapy

Butter makes everything better.


Oh goodness, my heart has been heavy these past few days. It seems my mind has been bogged down with worries that are fruitless, and situations that feel to be beyond my control. I do wish that I had that ability to look at something, place it into the appropriate compartment, and move on, but alas, I am not that good at it - - never have been. All I can do is keep trying, I suppose.


In the meantime, whenever I am feeling out-of-sorts, a bit of time in the kitchen is usually just what I need to feel like me again. I love to cook, and I love to feed people - - it makes me happy. So, this past Sunday morning, while all of my boys were otherwise occupied, I holed up in my yellow kitchen and turned a bunch of ingredients into food for my family. I made honey wheat bread. I made rosemary bread. I filled my crock pot, and set some beef stew simmering. Best of all? After ten years of marriage, I'm happy to report that I finally cracked the code to the perfect apple streusel pie, as declared by Steve on Sunday evening. The apples were soft, but not too soft. The pie sliced perfectly, with no runny mess left in the pie plate. Pie nirvana, I tell you.


Music is always an important part of a kitchen marathon. I am all over the place in that area - - I like a little bit of everything. Through the sifting, dicing, slicing, and kneading, I listened to Nora Jones, Jessie Colter, Margaret Whiting, Doris Day, Pink, Miranda Lambert, George Jones, and Justin Timberlake. See? All over the place.


When all was said and done, I felt like a huge burden had been lifted off my shoulders, somehow.


What do you do, when you need to reset your frame-of-mind?

Sunday, October 30, 2011

Date Night: Pasta Carbonara with Leeks & Lemon


Steve and I have never been good about making time to hire a babysitter and go out together. We don't really know anyone who babysits around these parts either, so that doesn't help. We both like to cook though, so recently we've taken to making some mac & cheese, getting a Redbox, and banishing the children in the family room so that we can have 1.5-2 hours of kid-free time to cook and have a meal together (the kind of meal that the children would most likely gag and make faces at). I'm on a personal mission to make sure we do this once a week. It will become especially important when Steve heads back to work in a couple of weeks, and the stress level around here goes from zero to about 250. Not exactly looking forward to that. But, I digress...


I think I've mentioned before that I love the magazine Everyday Food. I look forward to receiving my subscription every month, and I always end up making something from every issue. For last week's date night, I made Pasta Carbonara with Leeks & Lemon. Below is my own adaptation of the recipe - - I made a couple of changes to suit our tastes. You can find the original recipe in the November 2011 issue, on page 16.


Pasta Carbonara with Leeks & Lemons


10 slices thick-cut bacon, sliced crosswise in 1-inch pieces

2 large leeks (white and light green part only), halved lengthwise and sliced thin **

3/4 lb. short pasta, such as orecchiette or fusilli

2 large, fresh eggs

1/4 cup grated Parmesan (plus more for serving)

1/2 - 1 Tbsp. finely grated lemon zest, depending on taste. I used 1 Tbsp. and liked the flavor; Steve could have done with less lemon.

1 Tbsp. fresh lemon juice

1/2 cup fresh parsley leaves, chopped


** Leeks can be a pain to clean. Dirt likes to hide between the layers. If you cut them crosswise, then hold on to one end firmly, you can separate the layers under running water and wash away all the grit. You can also Google "cleaning leeks" and find all kinds of different ways to clean them without a lot of effort.


Set a large pot of salted water to boil. Meanwhile, cook bacon over medium heat, stirring occasionally, for 8-10 minutes until crisp. Remove bacon with a slotted spoon to drain on a paper towel. Remove all but 2 Tbsp. of the bacon grease from the pan, and add the leeks. Season with salt and pepper, then cook, stirring often, until leeks are beginning to brown, approximately 10 minutes.


Add pasta to boiling water and cook according to package directions. While the pasta is cooking, whisk the eggs together in a bowl. Whisk in the Parmesan, lemon zest, and lemon juice. Remove 1/4 cup of the boiling pasta water, and whisk it into the egg mixture.


Drain the cooked pasta, and immediately add to the egg mixture, along with the bacon, leeks, and parsley. Season to taste with salt and pepper. Serve immediately. Tastes even better the second day!

Monday, August 22, 2011

Getting Ready for the Third Grade


We have reached that weird part of summer where I am not ready for Camden to be gone all day, every day again, but at the same time, we are all in need of getting back to our school-year routine. So, I guess it really is time for back-to-school. I think we are all ready ~ we will be going to "Meet Your Teacher" night tomorrow at Camden's new school. Camden wanted to make "survival kits" like we did last year, so we tackled that last week. All of the items, including the box, can be found at your local dollar store, and I just made a tag to tie to the top. Camden has two teachers this year (one teaches the a.m. portion, and one in the afternoon) so we just doubled up.


This past Friday, I had a special dinner for the boys to celebrate back to school, which has sort of turned into a tradition around here. I always make a special treat, and really wanted to make some cake pops, but wasn't really looking forward to it. This was due to the fact that I've made cake balls before (same thing, only without the stick) and they were a messy, messy disaster. I guess I just wasn't making them properly, because these cute little apples were easy to make and came out so cute! I followed the instructions found here, and the only thing I did differently was to stick the cake pops in the freezer for about 15 minutes, after I'd attached the sticks and before I'd dipped them in the candy melts. The boys loved them. Warning: using a regular cake mix will produce a TON of these things. Going forward, I think I will use one of the mixes you can find at the dollar store for 12 cupcakes. I now can totally understand why people have blogs dedicated solely to cake pop-making...they are addictive!

Wednesday, July 13, 2011

Lemon Ricotta Dip (and some gardening blogs)

My little garden is coming along nicely this summer, but more on that later. This is my third attempt at having a garden ~ the first year, pretty successful, the second year, a big ol' bomb, and this year...I think this is the year that will have me hooked. I am already envisioning more raised beds next year, and expanding on what has been successful so far. For gardening inspiration, I have two blogs that I am just loving right now.


The first is Seed. Sow. Water. Grow. and is written by Angela in Oregon. She includes recipes, and I recently tried her Lemon Ricotta Dip ~ it was fabulous (I called it dip, although it is Lemon Ricotta Spread in the original recipe - - mine came out with a dip consistency but maybe that had something to do with my technique...who knows!). I also made the pita chips, and I can tell you, I will be making this over and over. I just checked to see if I have the ingredients on hand (I do) so I think I'll whip up another batch today. Yum!

The second is Sweat Bread, written by Jordan in North Carolina. She also includes recipes, and I just love seeing what she's growing in her garden and serving at her dinner table.

The only thing I've harvested so far is a ton of basil, mint, and rosemary, and one little cherry tomato! I think in about a week I should have some zucchini, and I already have plans for that!

Tuesday, July 12, 2011

Pizza Bianca


I love making pizza on Friday nights. It is a quick and easy dinner, and all three of my boys look forward to it. I usually try to make one "kid friendly" pizza (always pepperoni, or half pepperoni/half cheese) and then one pizza that's a little out of the ordinary. Since Steve's been deployed, I've kind of gotten into the habit of making a pepperoni pizza for the boys, and then a small pizza for myself on a gluten-free crust. I'm trying to get more adventurous again, in preparation for Steve's return, so I tried a new recipe last Friday, which was featured in the June 2011 issue of Everyday Food (my most-favorite cooking magazine). I really liked it, so I will definitely have to try it out on Steve when he gets back.


Pizza Bianca


1 lb. pizza dough (this is my new favorite recipe ~ it makes 1.5 lbs though, so just remove 1/3 from your ball of dough and make a thin crust pizza)


1/2 cup ricotta cheese

1 Tbsp. olive oil

1 garlic clove, minced

coarse salt and ground pepper


1 1/2 cups shredded mozzarella

1/3 cup grated parmesan (fresh grated preferable)


2 oz. baby arugula

2 tsp. olive oil

salt and pepper to taste


Mix the ricotta, oil, garlic, salt, and pepper in a small bowl. Set aside. Par-bake your pizza crust at 400 degrees for 10 minutes. Increase oven temperature to 425 degrees. Spread ricotta mixture over crust. Top with mozzarella and parmesan. Bake at 425 for 8-10 minutes, until it begins to brown very lightly. Remove from oven. Toss arugula with remaining olive oil and season with salt and pepper and apply to top of pizza.


If you don't care for arugula, you could also use baby spinach. I think this pizza would also be great with some prosciutto or some sausage.

Sunday, July 10, 2011

Homemade Ginger Ale


I recently stumbled across this recipe for homemade ginger ale at Food For My Family. I'm not a big pop drinker, but I do like ginger ale. I also frequently steep and drink fresh ginger root and lemon juice for chronic stomach issues, so I thought this might be a good alternative. Plus it just sounded refreshing.


First, get a big ol' hunk of ginger root at the grocery store. You'll need enough to equal 3 cups. This piece only cost me about $2.00. Peel it, rinse it, and then chop it up.


Once you have your ginger root all chopped, you'll also want to carefully remove 1 tablespoon of lime peel from a fresh lime. It can be a little tricky, because you don't want to get any of the pith (the white part) or it will taste bitter. Add the lime peel and ginger root to 6 cups of water. Bring to a boil, turn down to medium-low and simmer for 15 minutes. Add 1 1/2 cups of sugar and stir until dissolved. Simmer another 10 minutes.


Turn off the burner and let the syrup cool. Then, strain out the ginger chunks and lime peel, and pour the cooled syrup into an airtight container. Store in the fridge until ready to use.


To make a glass of ginger ale, pour 1/4 cup of the syrup over ice. Add 1 cup (or more, according to taste) of club soda. Stir gently and enjoy!


I really love this ginger ale - - it has quite a bite to it, but if you don't like it super-gingery, just add more club soda. I also think it would be great for mixing cocktails. Yum!

Saturday, July 09, 2011

Fresh, Sweet Cherries

We are very lucky to live near a plethora of orchards. Unfortunately, the number of these orchards have decreased drastically, just in the 10 years that I've lived here. I'm also embarrassed to admit that I've not taken advantage of them like I should have been, but from now on, I intend to. It is an inexpensive way to fill your freezer full of fresh, local fruits and veggies - - there's nothing better than that. So, the other day, Nana and I took the boys to a local orchard for some cherry picking. The boys had a blast and were great little pickers. All told, we picked 11 pounds between the four of us!

My mother might want to consider a second career as a cherry pitter. Thanks to her, all 11 pounds have been pitted and frozen. Yay for cherries!

Monday, June 20, 2011

Smitten Kitchen's Chocolate Peanut Butter Cake


For Father's Day, I made this cake for my dad, found at Smitten Kitchen. My dad loves peanut butter, and so I thought this would be the perfect cake for him. The recipe did not disappoint ~ it produces a super-moist, rich, delicious cake. Usually, I am not a fan of 'from scratch' cakes, because I find it difficult to come across many recipes that result in a moist cake. I find absolutely nothing wrong with cake mixes, in fact, I prefer them. However, this particular cake is so perfect in every way, it has been placed on a recipe card and added to my recipe box, where only my favorite recipes go. If you know someone who loves peanut butter, or more specifically, peanut butter and chocolate, give this cake a try...you will be happy you did!

Thursday, March 17, 2011

St. Patrick's Day


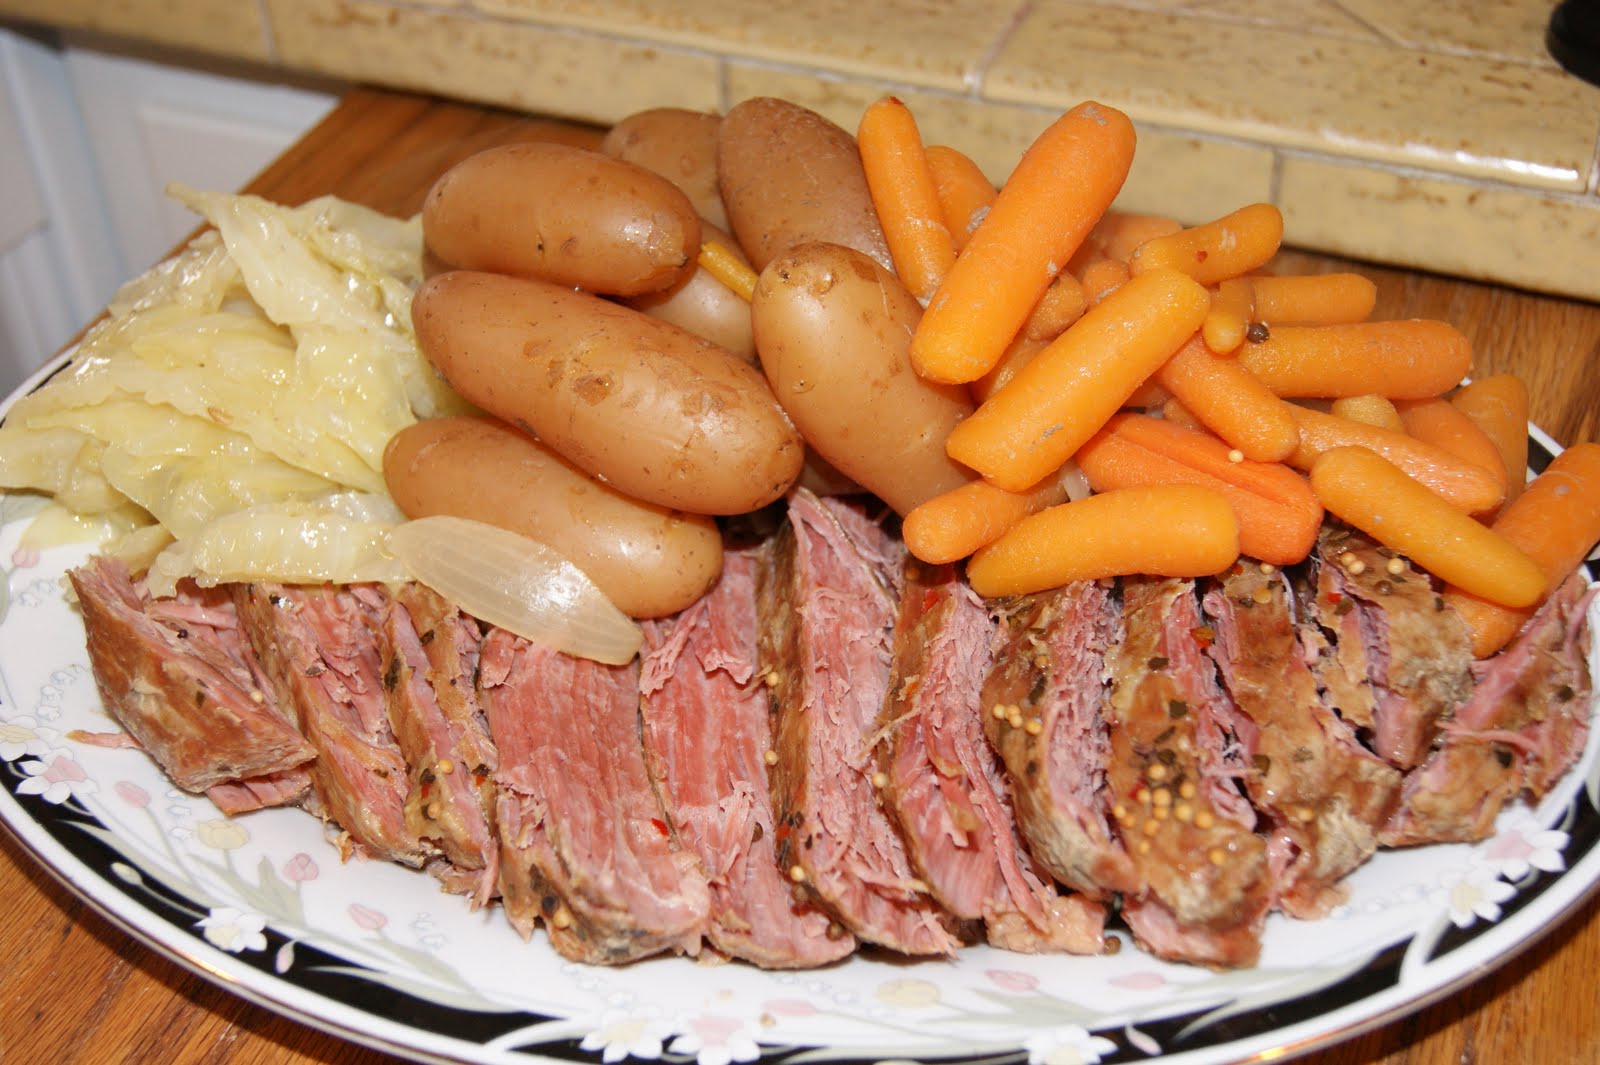
I'm so mad at myself! My sweet boys were dressed to the hilt for St. Patrick's Day - - green shirts, green hats, and even green hair...and I didn't take a single picture! I even remembered it after Camden went to school and vowed to take a picture of them together as soon as Cam came home...and I forgot a second time. Drats. As you can see, I did remember to take a picture of my brisket. Nowhere near as interesting as my boys, but delicious none-the-less. I usually boil brisket on the stove top, but this year I decided to try a slow cooker recipe. I'm happy to say that it turned out great! The only change I made to the recipe is that I used low sodium beef broth instead of beer (because that's what I had on hand) and the flavor was great. Also, I cooked it on low for 8 hours, rather than high as the recipe stated. I'm glad I did this, because the internal temperature registered as done after only 7 hours on low. I think if I'd cooked it on high, it would have turned out like an old leather shoe! This is definitely a recipe I will use again.

Sunday, February 27, 2011

Dinner In

I was really hoping that Steve and I could have gotten away for dinner while he was home, but it didn't work out, so instead we opted to send the boys next door to Gramma and Grampa for a couple of hours so that we could cook dinner together. We ended up having a great time, and I'm so glad we did it!


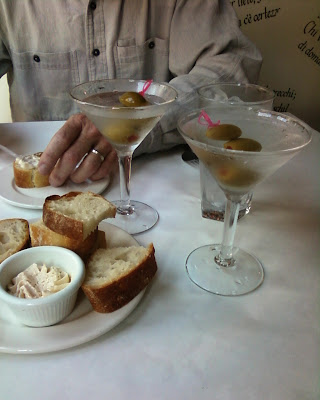
We started out with a variety of cheeses, some candied walnuts, grapes, and baguette, along with some gin martinis. Yum.

I still have some work to do in perfecting my gin martini-making abilities, but these turned out pretty well...


We decided on a recipe that Steve had prepared for me before...Pan roasted chicken with lemon, olives, and rosemary, from one of our favorite cookbooks, At Blanchard's Table.


(I'm really noticing the difference in food photos with my new camera!)

By the time dinner was over, we'd eating a lot of great food, drank one-too-many martinis, and had a lot of laughs. A wonderful evening!

Monday, January 10, 2011

I Heart These Cookies


I think I've mentioned before, how much I love Everyday Food magazine. I can hardly wait for it to show up in my mailbox each month. It really is jam-packed full of easy, delicious recipes, as well as lots of helpful hints for the kitchen. Love it! Anyway, my new issue arrived this past week. I was set to provide food for fellowship hour at church this week, so I took the opportunity to whip up a batch of these cookies, and they did not disappoint! These are basically a rich butter cookie, but with the addition of cornmeal, which I think gives this cookie wonderful texture. Give these a try - - you won't be sorry. However....PLEASE, for the love of all things holy, do NOT use margarine when making these cookies. Use pure, unsalted butter. Thank you!
Heart-Glazed Cornmeal Cookies (Everyday Food, Jan./Feb. 2011 issue)
2 cups all-purpose flour, spooned and leveled)
1/2 cup fine yellow cornmeal
1/2 tsp. kosher salt
1 cup (2 sticks) unsalted butter, at room temperature
3/4 cup granulated sugar
1 large egg
1 tsp pure vanilla extract
glaze:
1/2 cup confectioner's sugar
2 drops red food coloring
1 3/4 tsp. water
1/4 tsp. pure vanilla extract
Preheat oven to 400 degrees. In a medium bowl, whisk flour, cornmeal, and salt, set aside. In a large bowl, beat butter and 1/2 cup of the sugar together with an electric mixer on medium-high for 3 minutes. Add egg and 1 tsp. of vanilla, beat until combined. With mixer on low, gradually add flour mixture to butter mixture and mix until combined.
Place the remaining 1/4 cup of sugar in a small bowl; roll dough into 1-inch balls and coat with sugar. Place on parchment-lined cookie sheets. With the bottom of a glass, flatten the balls to 1 1/2 inches in diameter. Press a 1-inch heart cookie cutter into each circle (do not cut all the way through). Bake until cookies are golden at edges, 10 minutes. Let cookies cool on wire racks (undecorated cookies can be stored in an air-tight container for up to 4 days).
In a small bowl, whisk together confectioner's sugar, remaining 1/4 tsp. vanilla, 1 3/4 tsp. water, and red food coloring. Using a small knife, spread glaze over the heart shape. Let set for 15 minutes.

Friday, January 07, 2011

Caramelized Onions

I've mentioned a few times before that Friday night at our house is homemade pizza night. The boys all love it, and it is a guaranteed quick and easy meal for me to prepare. One of my favorite things to put on the "grown-up" pizza is caramelized onions. So easy to make, and so addictive and delicious. If you don't care for onions on your pizza, you still ought to give these a try, because it is a very different flavor than just chopping up some onions and throwing them on your pizza. All you need is one onion - - doesn't matter what kind. I have used red, white, and vidalia and all are great. Cut the onion in half, and then slice each half very thin. Meanwhile, heat 1-2 tablespoons of olive oil in a pan over medium heat. Toss in your onions, and sprinkle 1-2 tablespoons of brown sugar over the top. Stir well. Continue stirring as they cook, for approximately 10 minutes.

If your onions start to brown at all, then you have the heat up too high and may want to turn it down a bit. You are looking for the onions to soften and turn a nice golden color. Don't try to rush them - - the slower they cook, the better they will be.


The end result should look like this. Put as many as you'd like on top of your pizza. I guarantee you, you've never tasted anything like this. They are soooo good. I just put whatever is left over in a Tupperware in the fridge and use them the following week. Some of my favorite combos using caramelized onion are pesto/fresh mozzarella/sausage/caramelized onion, and artichoke heart/black olive/caramelized onion. Just mix them with your favorite topping and give it a try!

Wednesday, January 05, 2011

Something to Try

Do you have an over-abundance of these little medicine-dispensing cups in your house? I actually just got done tossing about ten of them, when I was cleaning out my cupboards. They seem to multiply in the dark in there. I did save a couple though, because they make great maple-syrup-pourers for my little guys.

For some reason, pancakes just taste better when you get to pour your own syrup.

Saturday, November 13, 2010

New Orleans: Food, Food, Food

In the short amount of time that Steve and I stayed in New Orleans, we managed to eat a lot of wonderful food. I keep thinking of Julia Roberts in the movie Eat, Pray, Love - - that every bite I put into my mouth was going to be savored and enjoyed...and, it was. Besides beignets and cafe au lait, we made sure to indulge in other local favorites, such as gumbo, red beans and rice, hush puppies, catfish, and pralines. We had been given quite a few recommendations for restaurants, but found that our favorites ended up being places that we just happened to stumble upon.


Pecan Pie and cocktails at Pere Antoine on Royal Street, French Quarter

10-cent martinis with lunch, Bacco on Chartres, French Quarter

The most unbelievable Portobello Mushroom Bisque at The Marigny Brasserie, Frenchmen Street

We ate a couple of times at a great place called Stanley on Chartres...take a look at their website and read the "our story" section. We both had gumbo at Stanley and it was absolutely delicious. They also served a wonderful hearts of romaine salad, which we ordered both times we were there.
I do wish I'd eaten a Po'Boy while I was there, and also some bananas foster. Next time!
**Just wanted to add....I am having a terrible time uploading pictures to Blogger. I can upload them, but no longer seem to be able to move them to where I want them in my post, as I'm composing it. Is anyone else having this issue? It is driving me nuts!**
Blog Widget by LinkWithin